Hey pizza enthusiast! So, you’ve got that ball of pizza dough in your hands, and you’re ready to transform it into a canvas for cheesy, saucy goodness. But wait, how do you stretch pizza dough without turning it into a misshapen mess? Fear not, my dough-disciple, because we’re about to embark on a journey of pizza perfection. Get ready to channel your inner pizzaiolo!
Step 1: Flour Power – Prep Your Work Surface
Before we dive into the dough-stretching extravaganza, let’s talk about the stage – your work surface. Dust it with a bit of flour, like you’re giving it a magical coat. This prevents the dough from sticking and allows it to glide and stretch with ease. Think of it as the red carpet for your pizza dough.
Step 2: Gentle Beginnings – Press and Pat
Place your dough ball on the floured surface and give it a gentle pat. It’s like saying, “Hey dough, we’re in this together.” Use your fingertips to press the dough outward from the center, creating a thick border. This step is like laying the foundation for your pizza masterpiece.
Step 3: The Edge of Glory – Create a Crust
Now, let’s talk crust – the glorious edge that holds all the cheesy goodness. Use your fingers to gently pinch and lift the edges of the dough, rotating it as you go. It’s like sculpting a pizza masterpiece, and you’re the Michelangelo of the kitchen.
Step 4: Airborne Adventure – The Toss
If you’re feeling adventurous, give the dough a toss. Yes, like those pizza pros on TV! It’s not just for show; tossing helps to evenly distribute the weight of the dough and stretch it out. Think of it as giving your pizza wings before it lands on the baking sheet.
*Pro Tip: If tossing feels too daring, you can achieve the same effect by gently stretching the dough with your hands.
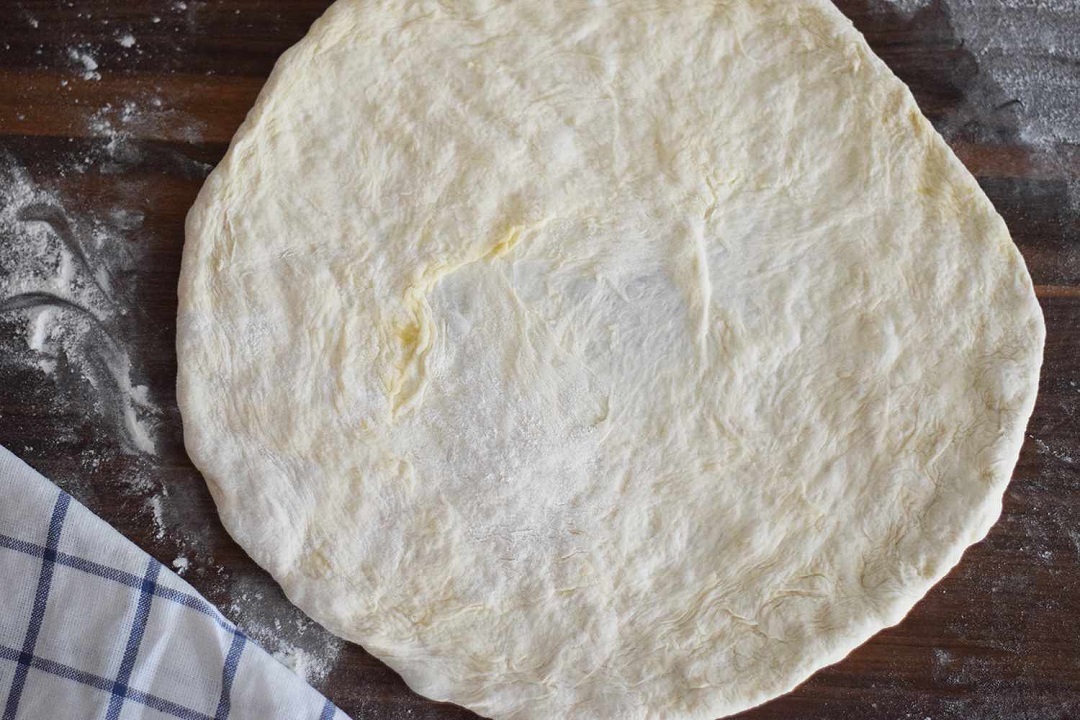
Step 5: The Stretch Dance – Hands-On Action
Now, let’s get hands-on – literally. Use your hands to gently stretch the dough from the center towards the edges. Rotate the dough as you go, creating a circular canvas. It’s like giving your pizza dough a spa treatment – smooth, gentle, and oh-so-relaxed.
Step 6: Thin Is In – Aim for Even Thickness
As you stretch, aim for an even thickness across the entire pizza. You want a thin, uniform crust that bakes to golden perfection. It’s like crafting a pizza canvas where every bite is a masterpiece.
Step 7: Patience Pays – Let It Rest
Pizza dough, like all great things, benefits from a little rest. Allow your stretched dough to rest for a few minutes before topping. It’s like giving your dough a moment to collect its thoughts and prepare for the flavor explosion ahead.
FAQs – Your Dough-Stretching Wisdom
Q1: Can I use a rolling pin to stretch pizza dough?
Absolutely! While traditionalists might prefer hand-stretching, a rolling pin works like a charm. Just roll it gently from the center towards the edges until you achieve your desired thickness.
Q2: My dough keeps springing back. What should I do?
No worries! If the dough keeps bouncing back, let it rest for a few minutes and try again. Sometimes, a little relaxation is all it needs.
Q3: How thin should I stretch the pizza dough?
It’s all about personal preference. Some love a thin, crispy crust, while others prefer it a bit thicker. Experiment and find your perfect thickness.
Q4: Can I freeze pizza dough after stretching?
Absolutely! If you’re not baking right away, you can freeze the stretched dough. Just wrap it tightly in plastic wrap and thaw it in the fridge when you’re ready to create your pizza masterpiece.
Q5: Should I pre-bake the dough before adding toppings?
It depends on your pizza style. Pre-baking, or par-baking, can give you a crispier crust, but it’s not necessary. Experiment and see what suits your taste buds.
And there you have it – the ultimate guide to stretching pizza dough like a pro. Now, go forth, dust off that flour, and let the pizza-making adventure begin. Your pizza dough is waiting to be transformed into a cheesy, saucy masterpiece! Happy stretching!