Flyers in English or a flyer in Spanish represent one of the many forms of advertising that exist and that has changed over the years since its creation when aviation was in charge of launching product or event promotions in the air printed flyers. In the computer and computing market there is much software capable of creating beautiful and varied flyer designs, but if you are looking for one that is easy and fast to use as well as elegant, do not miss this article. Next, we show you how to make a flyer in Word with a step-by-step guide and photos.
How to make a flyer in Word?
The Word computer program allows us to view, edit and create text documents of all kinds with a few simple actions. Included within the Microsoft Office suite of programs, it has evolved in such a way that it has expanded its capabilities and options to create files that include indexes, margins, tables, smart graphics and multimedia formats such as images, video and sound. It is thanks to these advances that we currently find Word templates that allow a user without too much knowledge to create creative, original and modern brochures or flyers.

The basic steps to make a flyer in Word are the following:
- First, you will have to configure the page to change the size of the sheets, as well as their orientation, margins, etc. To do this, you just have to open Word and go to “Page layout”, where you will find the options “margins”, “orientation”, “size”, etc. I recommend that you bet on making inexpensive brochures of moderate size with the dimensions 10.5 x 14.8. If you want to make larger flyers, you can choose to indicate a larger size: 21 x 29.7, for example.
- We recommend creating a folder where you can store the images that you are going to use in the design of the flyer. You can find these photos in various Internet search engines (watch with image rights) or they can be photographs and designs made by you, something that will add originality to your flyer.
- For the next step, you will have to insert the backgrounds you want for your design. If you insert backgrounds with strong tone colors, you should consider light-colored letters for the text. Word also gives you the option to insert transparent backgrounds.
- Once you have the backgrounds inserted in the flyer, place the images that best represent what you want to transmit: logos, images of specific places where events are going to take place, etc. For this, you must be clear where you will place the images since the flyer or flyer must have an elegant appearance with well-ordered images.
- Finally, you will have to insert text boxes that allow you to place the letters in the most suitable place of the flyer. Here you can manipulate the size of the text, the font, the color of the font, the specific fill background for that text box and other characteristics. You can also write vertically, obliquely or inverted so that the flyer has a more original look and design.
With these steps, you can design a flyer in Word 2010 for any use, be it advertising or informational announcements, event invitations, greeting and greeting cards or any other type of information.
Make flyer templates in Word
With Word 2010 you can create flyer templates from scratch or use some predesigned templates of the program that you can also modify to your needs. Creating a flyer template is based on changing the page layout of a blank document and formatting it according to your needs. This can be easily done using the tools provided by this software, so here are the basic steps to create a flyer template in WordOpen a new document with Word.
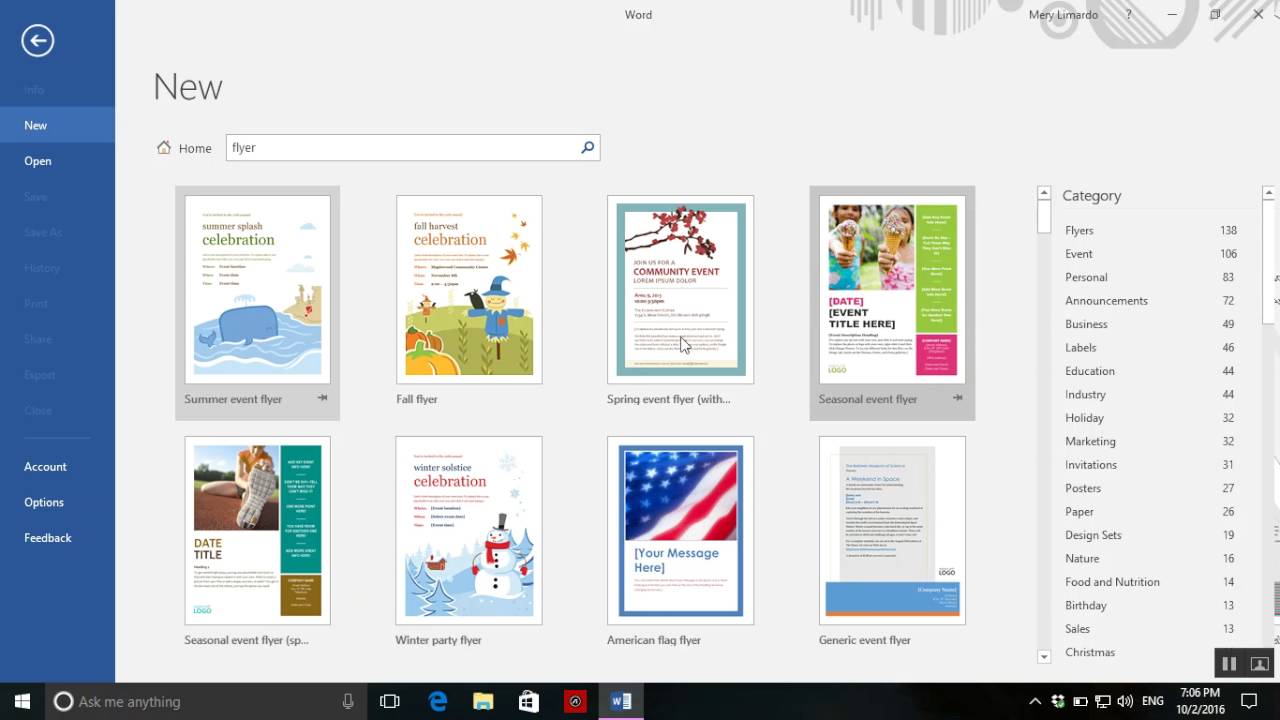
- As we have said, you can open a new document or select a predesigned template. To use a predesigned template, select “File”> “New”> “Booklets” . You may find this option under “File”> “New”> “Marketing Folder”. In that folder, you will find different types of predesigned brochures.
- Next, you will have to select the “Design” tab to change the size of the template to be designed, its orientation, margins, number of columns, etc.
- Finally, when you go to save the document, name it whatever you want and make sure you save the design by selecting Type> “Word Template” from the “Save How” menu.
Make a flyer in Word easy
To make an easy Word flyer from scratch, we recommend that you follow the step-by-step shown below:
- Open Microsoft Word 2010 and select a blank document.
- Give the page the format that best suits your needs as we have previously taught you.
- Download the images you are going to use for your flyer and save them in a specific folder.
- A tip that may be useful to you is to create a table with the number of rows and columns that you are going to use so that you can put the information you want in each cell or so that you can create a free design by inserting free shapes that house each of the images and text that you are going to place on the flyer.
- Select the background that best suits your design and theme to publish.
Keep in mind that making a flyer depends a lot on the imagination and creativity of the designer. A tip that will surely help you is to look at other flyers already designed to give you an idea of what you want to create. If you are wondering how to make an easy Word flyer from a pre-designed template, follow these steps:
- Open Microsoft Word 2010 and in the menu bar, press “File” and then “New”.
- Search, as we have previously indicated, for the template that says brochures or the marketing folder, where you will find several styles of the brochure.
- Download the template that you like the best and that best suits what you want to create.
- Start replacing clip art and text with your design and your own text.
- Save your new template with a name that refers to your design and it is ready to use. If you want, you can also preview your document without opening it.
You may like also to read https://iddaalihaber.com/