Handfasting ceremonies have experienced a remarkable revival in recent years. These ancient Celtic traditions create beautiful, personal moments for couples seeking meaningful alternatives to traditional weddings. Moreover, creating your own handfasting cord adds an extra layer of significance to this sacred ritual. Yifarope offers various cord-making supplies that can help you craft the perfect ceremonial piece for your special day.
Understanding Handfasting Traditions
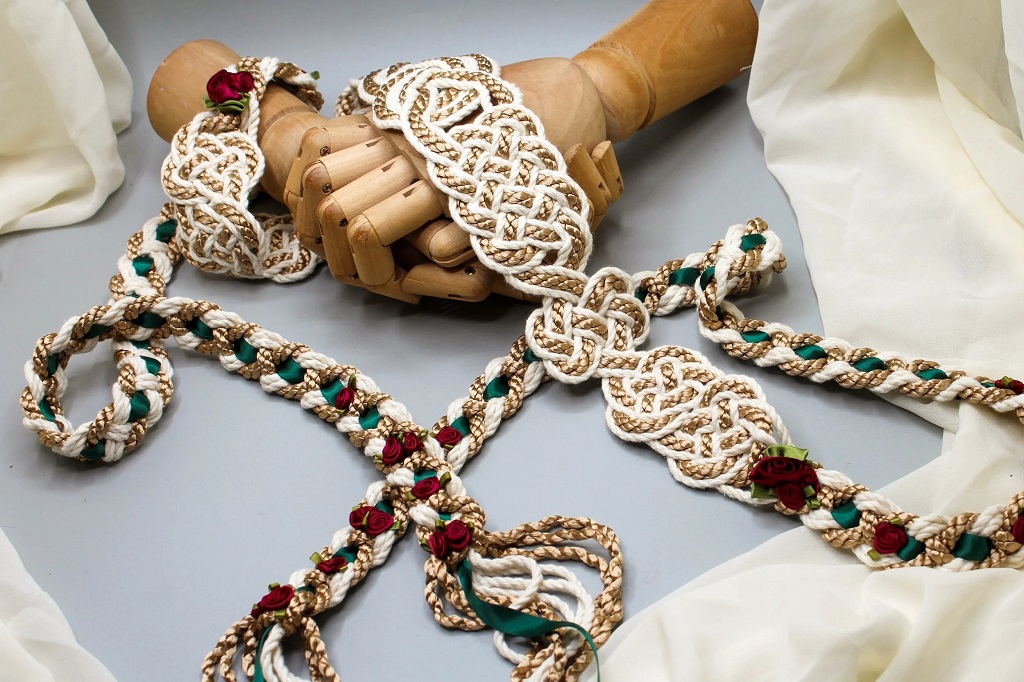
Handfasting represents the binding of two lives together through the symbolic tying of hands. This practice dates back thousands of years across various cultures. Additionally, the term “tying the knot” originates from this beautiful tradition. Creating a DIY handfasting cord allows couples to infuse their personal story into this ancient practice.
The ceremony itself involves wrapping the cord around the couple’s joined hands. Therefore, the cord becomes a tangible symbol of their commitment and love. Furthermore, many couples choose to display their handfasting cord in their home as a lasting reminder of their vows.
Essential Materials for Your DIY Project
Basic Supplies You’ll Need
Creating your handfasting cord requires careful selection of materials. Natural fibers work best because they hold symbolic meaning and feel comfortable during the ceremony. However, synthetic materials can also create beautiful results if chosen thoughtfully.
Consider these essential materials:
- Natural rope or cord (cotton, hemp, or silk)
- Scissors for cutting
- Measuring tape
- Decorative elements like beads or charms
- Optional ribbon for accent colors
Choosing the Right Cord Thickness
The thickness of your cord affects both appearance and comfort. Additionally, thicker cords create more dramatic visual impact during photographs. However, thinner cords allow for more intricate braiding patterns. Therefore, consider your ceremony’s style when making this decision.
Most couples find that cords between 1/4 inch and 1/2 inch thick work perfectly. Furthermore, this thickness provides enough substance without being cumbersome during the binding ritual.
Color Symbolism and Meaning
Traditional Color Meanings
Colors carry deep symbolic meaning in handfasting ceremonies. Red represents passion and love, while white symbolizes purity and new beginnings. Additionally, gold signifies prosperity and abundance in your union.
Green connects to nature and growth in your relationship. Blue represents loyalty and trust between partners. However, purple symbolizes spiritual connection and wisdom. Therefore, choose colors that resonate with your personal journey together.
Creating Your Personal Color Palette
Your handfasting cord should reflect your unique relationship. Consider colors that hold special meaning in your love story. Additionally, think about your wedding theme or favorite shared experiences.
Many couples incorporate their birthstone colors or seasonal elements. Furthermore, some choose colors that represent their cultural heritage. However, the most important aspect is selecting colors that feel authentic to your bond.
Step-by-Step Cord Creation Process
Measuring and Cutting Your Materials
Begin by determining the appropriate length for your cord. Additionally, consider that you’ll need enough length to wrap around both hands comfortably. Most handfasting cords measure between three and six feet long.
Cut your chosen materials with clean, sharp scissors. Furthermore, leave extra length for any fraying that might occur. However, remember that you can always trim excess material later in the process.
Basic Braiding Techniques
Start with simple three-strand braiding if you’re new to cord making. Additionally, this technique creates elegant, timeless results that photograph beautifully. Hold the three strands firmly at the top and begin crossing them alternately.
Keep consistent tension throughout the braiding process. Furthermore, this ensures your finished cord has uniform appearance and strength. However, avoid pulling too tightly, as this can create uncomfortable stiffness.
Advanced Braiding Patterns
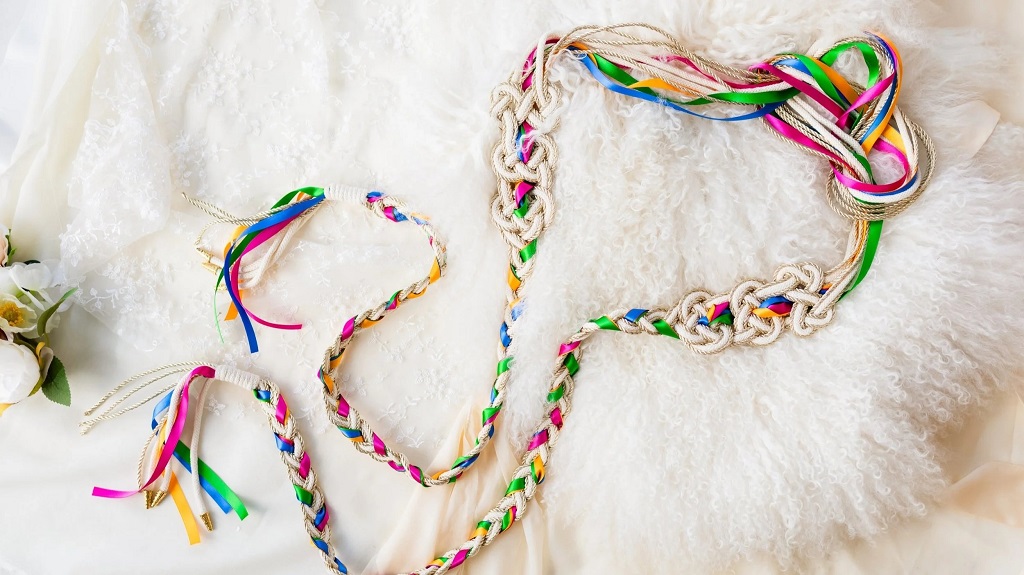
Four-strand braiding creates more complex, visually interesting patterns. Additionally, this technique allows for better color distribution if using multiple hues. Start by separating your strands into two pairs on each side.
Cross the right strand over the left, then bring the outer left strand to the center. Furthermore, repeat this pattern while maintaining steady rhythm. However, practice beforehand to ensure smooth execution during your ceremony preparation.
Adding Personal Touches and Decorations
Incorporating Meaningful Elements
Personal touches make your handfasting cord truly unique. Consider adding small charms that represent shared interests or important memories. Additionally, beads can represent family members or meaningful dates in your relationship.
Some couples include elements from nature, like small stones from special locations. Furthermore, dried flowers from your first date location add romantic symbolism. However, ensure all additions are securely attached to prevent loss during the ceremony.
Finishing Touches for Professional Appearance
Secure the ends of your cord with tight knots or decorative caps. Additionally, consider wrapping the ends with matching thread for polished appearance. This prevents fraying and extends your cord’s lifespan.
Apply clear nail polish to knot ends for extra security. Furthermore, this invisible protection maintains the cord’s natural appearance while providing durability. However, test this technique on a small section first to ensure compatibility with your materials.
Caring for Your Handmade Cord
Proper Storage Methods
Store your completed handfasting cord in a clean, dry location. Additionally, avoid areas with direct sunlight that might fade your chosen colors. Cedar chests or fabric bags provide excellent protection from dust and moisture.
Consider wrapping your cord in acid-free tissue paper for long-term preservation. Furthermore, this prevents color transfer between different sections. However, check periodically for any signs of deterioration or pest damage.
Cleaning and Maintenance
Natural fiber cords require gentle care to maintain their appearance. Additionally, spot cleaning with mild soap usually handles minor stains effectively. Avoid soaking the entire cord unless absolutely necessary.
Air drying prevents shrinkage and maintains the cord’s original shape. Furthermore, avoid direct heat sources that could damage natural fibers. However, consider professional cleaning for valuable or extensively decorated cords.
Ceremony Integration Tips
Coordinating with Your Officiant
Discuss your handfasting cord plans with your ceremony officiant beforehand. Additionally, explain any special handling requirements or symbolic meanings you’ve incorporated. This ensures smooth integration into your wedding ceremony.
Practice the binding ritual during your rehearsal if possible. Furthermore, this helps everyone involved feel comfortable with the process. However, keep the actual cord safely stored until your ceremony day.
Photography Considerations
Beautiful handfasting cords create stunning photographs when properly highlighted. Additionally, discuss lighting needs with your photographer beforehand. Natural lighting often shows cord colors and textures most accurately.
Consider the cord’s placement during different ceremony moments. Furthermore, ensure your photographer captures both close-up detail shots and wider ceremony views. However, prioritize the ritual’s meaning over perfect photography angles.
Conclusion
Creating a DIY handfasting cord transforms an ancient tradition into a deeply personal experience. Additionally, this meaningful project allows couples to infuse their love story into every twist and turn of their ceremonial cord. The process itself becomes part of your wedding journey, creating lasting memories before your special day arrives.
Furthermore, your handmade cord serves as a beautiful reminder of your commitment long after the ceremony ends. Therefore, take time to choose materials and colors that truly represent your unique bond. However, remember that the love you share matters more than perfect craftsmanship.
Read More Also: Electricity Rates in Miami-Dade County: What Businesses Are Paying in 2025
Frequently Asked Questions
What length should my DIY handfasting cord be?
Most handfasting cords measure between three and six feet long. Additionally, this provides enough length for comfortable wrapping around joined hands while allowing for decorative loops and knots. However, consider your specific ceremony needs and personal preferences when determining the ideal length.
Can I use synthetic materials for my handfasting cord?
Yes, synthetic materials can create beautiful handfasting cords. Additionally, they often offer more color options and durability than natural fibers. However, many couples prefer natural materials like cotton, hemp, or silk for their symbolic connection to the earth and traditional practices.
How far in advance should I make my handfasting cord?
Start your handfasting cord project at least two weeks before your ceremony. Additionally, this allows time for any needed adjustments or repairs. Furthermore, early completion reduces wedding week stress and ensures your cord is ready for any rehearsal needs.
What if I make mistakes while braiding my cord?
Mistakes in braiding can often be corrected by carefully undoing the affected section. Additionally, small imperfections add character and authenticity to handmade items. However, if major errors occur, consider starting fresh with new materials rather than compromising the final result.
Should I make backup cords for my ceremony?
Creating a backup cord is wise, especially for outdoor ceremonies where weather might affect your primary cord. Additionally, having a spare provides peace of mind on your wedding day. Furthermore, extra cords can become meaningful keepsakes for family members or future anniversaries.